How to Choose Marine Wire Gauge


The number stamped on a spool of wire looks like a small detail until the day a windlass stalls, a wire gets hot enough to soften its insulation, and you realize the run should have been two sizes bigger. Wire size is the single most common thing I fix on other people’s boats, and it is almost always undersized rather than over. Getting the gauge right is not hard math, but it is math nobody skips twice after they have watched a connection smoke.
This walkthrough gives you a repeatable way to pick the right conductor for any 12V circuit on your boat, using real amp figures, real run lengths, and the same charts the pros use.
Step 1: Understand what “gauge” actually means
Wire in North America is sized by AWG, short for American Wire Gauge. The counterintuitive part is that the number runs backward: a 10-gauge wire is thicker than a 16-gauge wire, and lower numbers carry more current.
Every gauge has an ampacity, meaning the amount of current it can carry continuously before the conductor overheats. That is your first ceiling. The second ceiling is voltage drop, which is the voltage you lose to resistance on the way to the load and back.
On a 12V system, small losses matter a lot. Lose 1.2 volts on a house-battery run and you have thrown away 10% of your available voltage before the appliance even sees it. If you want the full background on how these systems fit together, our 12V Boat Wiring Guide for Beginners is the pillar this guide supports.
Step 2: Gather your tools and the numbers you need
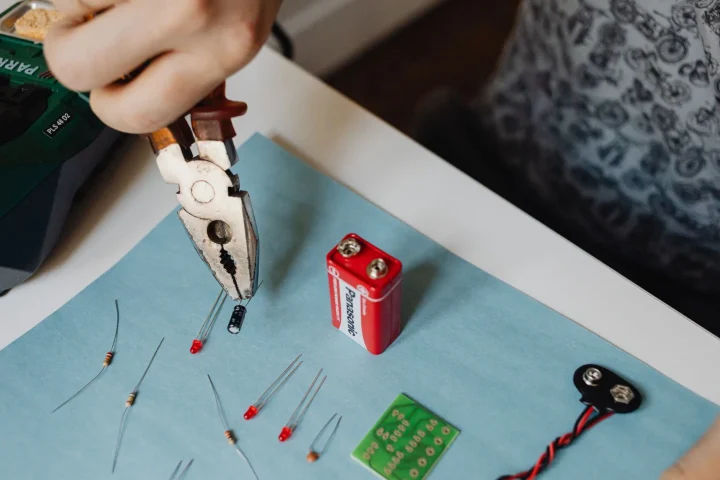
You do not need a lab. You need a tape measure or a length of string, the amp rating of the device, and a chart. A cheap multimeter helps for verifying real loads later, but it is optional for the sizing itself.
Write down three things before you touch a spool:
- The load current in amps. Read it off the device label, or divide watts by 12 for a rough figure (a 60-watt load is roughly 5 amps).
- The round-trip length in feet. Run your string from the busbar or battery, out to the device, and mentally double it for the return path.
- Whether the circuit is critical or non-critical. Bilge pumps, nav lights, and electronics are critical (3%). Cabin lights and a phone charger are not (10%).
Step 3: Size for voltage drop first, then check ampacity
Here is the part beginners get backward. They pick a wire that “handles the amps” and stop there. On short runs that is fine, but on anything past a few feet, voltage drop is usually the limit that forces you to a bigger wire, not ampacity.
So the order that saves rework is: calculate the size voltage drop demands, then confirm that size also clears the ampacity chart. Nine times out of ten the voltage-drop answer is already big enough for the amps. If you want the theory behind the numbers, our guide to Understanding Voltage Drop on Boats walks through the formula step by step.
The table below is the shortcut version for 12V circuits at the 3% (critical) standard, which is what the American Boat and Yacht Council recommends for most powered gear. Find your amps, find your round-trip length, read the gauge.
| Load (amps) | 10 ft round trip | 20 ft round trip | 30 ft round trip | 40 ft round trip |
|---|---|---|---|---|
| 5 A | 16 AWG | 14 AWG | 12 AWG | 10 AWG |
| 10 A | 14 AWG | 10 AWG | 10 AWG | 8 AWG |
| 15 A | 12 AWG | 10 AWG | 8 AWG | 6 AWG |
| 20 A | 10 AWG | 8 AWG | 6 AWG | 6 AWG |
| 30 A | 10 AWG | 6 AWG | 6 AWG | 4 AWG |
These are conservative on purpose. When your real numbers fall between two rows, round up to the thicker wire and you will never regret it.
Step 4: Work a real example end to end
Let me use a job from last spring. A client wanted a fresh run to a cockpit-mounted electric windlass on a 34-foot sailboat, and the previous owner had fed it with 12-gauge wire that ran warm every time the anchor came up.
The windlass drew 80 amps under load. The battery lived under the companionway, and the real wire path to the bow was 22 feet one way, so a 44-foot round trip. That is a heavy, long, high-current run, exactly the kind that punishes an undersized conductor.
At 80 amps over 44 feet at the 10% drop allowance we use for intermittent motor loads, the chart calls for 2 AWG. The old 12-gauge was off by roughly eight sizes, which is why it got hot. We pulled new 2-gauge tinned cable, and the windlass now holds full voltage at the motor.
Step 5: Buy the right wire, not just the right size
Gauge is only half the spec. The other half is the wire itself. On a boat you want tinned, stranded, marine-grade copper, and that is not marketing fluff.
Tinning is a thin coating of tin over each copper strand that fights corrosion in salt air. Stranding gives the wire the flexibility to survive a pounding hull without the strands work-hardening and cracking. Solid-core house wire, the kind in your garage walls, will corrode and fatigue-fail on the water, often inside a season or two.
Expect to pay more. Good tinned 10-gauge runs roughly 1 to 2 dollars a foot, and heavy 2-gauge battery cable can hit 4 to 6 dollars a foot. That premium buys you connections that still read clean on a multimeter five years later.
Step 6: Match the wire to its protection and its landing points
A wire is one link in a chain. The fuse or breaker protects the wire, not the device, so the protection rating must sit at or below the wire’s ampacity. Run a 10-gauge circuit and you generally protect it at 30 amps or less, never at 50.
Get this relationship right and the weakest point stays the fuse, which is designed to fail safely. Get it wrong and the wire becomes the fuse. Our breakdown of Fuses vs Circuit Breakers on Boats covers how to pick and rate that protection.
The ends matter too. Crimped, heat-shrinked, tinned terminals landing on a proper distribution point keep resistance low and corrosion out. If your grounds and positives currently daisy-chain from one lug to the next, read Building a Marine Busbar the Right Way and fix that first. A clean busbar makes every future circuit easier to size and troubleshoot.
A quick sanity check before you crimp
Before you cut anything, run the whole thing back once: load amps, round-trip feet, critical or not, chart lookup, then round up. If two of those inputs are guesses, the answer is a guess too, so spend the extra five minutes measuring the real run.
The habit that has saved me the most callbacks is treating copper as the cheap part of the job. The wire on a windlass run might cost 40 dollars more at 2-gauge than at 4-gauge, and that difference is nothing next to a stalled anchor at a lee shore or a cooked connection behind a headliner.
Get the marine wire gauge right the first time, buy tinned copper, protect it at or below its rating, and that circuit will outlast most of the gear you hang off it. For the standards behind these recommendations, the BoatUS guide to marine wiring is a solid reference to keep bookmarked.
Frequently asked questions
Should I size marine wire for amps or for voltage drop?
Size for voltage drop first, then confirm the wire also clears the ampacity chart for your load. On any run longer than a few feet, voltage drop usually forces a bigger wire than the amps alone would. On short runs, ampacity is often the limit instead.
Do I measure the one-way distance or the round-trip length?
Always use the round-trip length, which is the positive run plus the return negative run added together. A device that sits 14 feet from the battery is a 28-foot round trip for sizing purposes. Using the one-way figure is the single most common reason boat owners end up with undersized wire.
What is the difference between 3% and 10% voltage drop?
The 3% standard is for critical circuits like nav lights, bilge pumps, and electronics, where losing voltage causes real problems. The 10% allowance is for non-critical or intermittent loads such as cabin lights or motor starts. Using 3% gives you a bigger, safer wire, so use it whenever you are unsure.
Can I use regular house wire on my boat if the gauge is correct?
No. House wire is usually solid copper without tinning, so it corrodes in salt air and the strands fatigue and crack from hull vibration. Boats need tinned, stranded, marine-grade copper that meets a standard like UL 1426. Correct gauge does not fix the wrong wire type.
What gauge does an electric windlass usually need?
It depends on the draw and the distance, but windlasses pull very high current over long bow runs. An 80 amp windlass on a 44-foot round trip needs roughly 2 AWG cable at the 10% drop allowance. Always check your own amp rating and measured run against a chart rather than guessing.