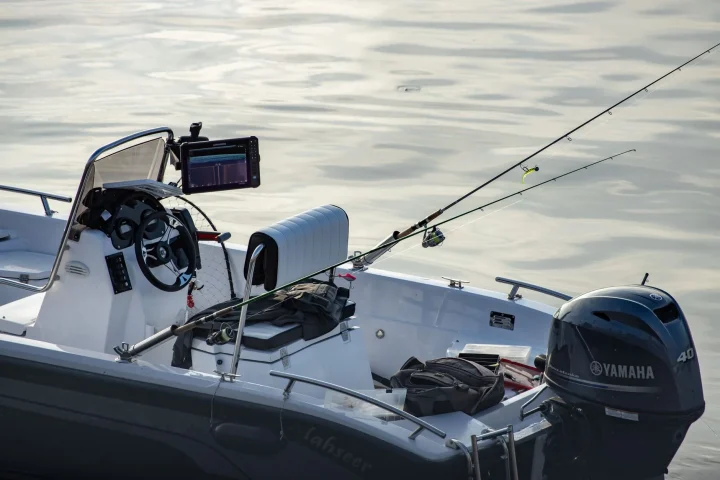
6 Marine Electronics Install Mistakes


Most electronics on a boat do not fail because the unit is bad. They fail because of what happened during the install: a crimp that was never sealed, a wire two sizes too thin, a fuse that lives in the wrong place. I have pulled apart dashboards where a $900 chartplotter went dark, and nine times out of ten the fault was six inches of bad wiring, not the screen.
The good news is that these problems repeat. The same handful of shortcuts sink most weekend projects, which means you can sidestep nearly all of them once you know the pattern. Below are the six marine electronics install mistakes I see most often, what actually goes wrong on the water, and how to do it right the first time.
Mistake 1: Undersizing the wire and ignoring voltage drop
This is the one I run into most. Someone reads that their VHF radio draws 5 amps, grabs whatever thin wire is in the drawer, and runs it 18 feet to the helm. On paper 5 amps looks tame. The problem is the length.
Voltage drop is the amount of voltage you lose as current fights its way down a wire. Thin wire and long runs both make it worse. In a 12V system, losing even half a volt matters, because your electronics were designed to see something close to 12.6 volts, not 11.8.
Marine standards call for keeping voltage drop under 3 percent on critical circuits like electronics and navigation gear. The American Boat and Yacht Council (ABYC) publishes the wiring tables most installers work from, and they are worth trusting over guesswork.
Here is a rough guide for a 12V run at the 3 percent target. Remember to count both directions: a device 10 feet from the battery needs 20 feet of wire in the circuit.
| Load | Round-trip length | Minimum wire gauge |
|---|---|---|
| 5 amps | 20 ft | 14 AWG |
| 10 amps | 20 ft | 12 AWG |
| 10 amps | 40 ft | 10 AWG |
| 20 amps | 30 ft | 8 AWG |
When in doubt, go one gauge heavier. Copper is cheap compared to a fried $600 fish finder, and thicker wire runs cooler and lasts longer. The full logic of planning your runs is covered in our Marine Electronics Setup Guide, which is worth reading before you cut a single wire.

Mistake 2: Fusing wrong, or not at all
A fuse protects the wire, not the device. That sentence trips up almost everyone. People size the fuse to the gadget’s draw, when the fuse’s real job is to blow before the wire itself overheats and starts a fire.
The most dangerous version of this mistake is running an unfused wire straight from the battery. If that wire chafes through against a metal bracket, you now have a dead short pulling hundreds of amps with nothing to stop it. That is how boats catch fire at the dock.
Size the fuse to the wire’s ampacity, then confirm the device draw sits comfortably below it. A 12 AWG wire is generally good for a 20 or 25 amp fuse; that same fuse happily protects a 10 amp radio. The fuse is guarding the copper, and the copper is guarding your boat.
Mistake 3: Automotive connectors on a saltwater boat
Walk any marina and you will find dashboards full of red and blue vinyl butt connectors from the auto-parts store. They are fine in a dry car. On a boat they are a slow leak of reliability.
Salt air wicks into the bare crimp, the copper corrodes green, resistance climbs, and your screen starts browning out or rebooting on a bumpy day. I rewired a center console last spring where the previous owner had used 40-odd standard butt splices. Half of them crumbled when I touched them.
Two changes fix this for good:
- Use tinned marine-grade copper wire. The tin coating resists corrosion far better than bare copper, and it is the standard for a reason.
- Use adhesive-lined heat-shrink connectors. When you heat them, glue melts inside and seals the joint against water. A good crimp plus that seal is nearly bulletproof.
Mistake 4: Bad transducer and antenna placement
You can buy the best sonar on the shelf and still get a useless picture if the transducer is in the wrong spot. The transducer is the puck that sends and reads the sonar signal, and it needs clean, undisturbed water flowing across its face.
Mount it behind a strake, a through-hull fitting, or the outboard’s prop wash, and it will read turbulence instead of fish. At speed the screen fills with static and you lose bottom lock entirely. If you are still choosing gear, our guide on how to choose a fish finder walks through matching the transducer to your hull.
Antennas have the same rule in a different form. A VHF antenna wants height and clear sky, because VHF is roughly line-of-sight. Mount it low or tuck it beside a metal arch and your 5 to 10 mile range shrinks fast. The step-by-step in installing a marine VHF radio covers cable routing and the connector that fails most.
If you are running a combined unit, the placement stakes go up because one screen now depends on two good installs. Our breakdown of chartplotter vs fish finder combos explains what you gain and give up.
Mistake 5: Sloppy grounding and no bonding plan
Grounding is the return path for your electrical current, and on a boat it does double duty by draining electrical noise. Get it wrong and you will hear it: a whine through the stereo, a fish finder that ghosts when the engine runs, a chartplotter that flickers.
The classic error is daisy-chaining every ground to whatever screw is nearest. Instead, run grounds back to a common bus bar, a single metal strip where all the negative wires land. One clean reference point cures a surprising amount of gremlins.
Corrosion is the second half of this story. Stray current from a poor ground can eat metal fittings below the waterline in a single season. BoatUS has good plain-English reading on stray-current corrosion if you want to understand why bonding matters.
Mistake 6: No plan for the electrical load
People add a plotter, then a stereo, then LED lights, then a second bilge pump, all off the same old panel. Nobody ever adds up the amps. Then the battery dies at anchor and the owner blames the battery.
Before you install anything, list every device and its draw, add it up, and compare that to your battery bank and charging. A modern sounder and plotter combo might pull 3 to 4 amps on their own, and that adds up over a long day with the engine off.
This is also the moment many owners realize their old lead-acid setup is undersized. If you find yourself rationing electronics to save the battery, our lithium boat battery upgrade guide lays out when the swap actually pays off and what the install involves.
Doing it right the first time
None of these six fixes are hard. They are mostly about slowing down: the right gauge, a fuse near the source, sealed connectors, smart placement, a common ground, and a load you have actually counted. Do those and your electronics will outlast the boat you put them in.
Buy tinned wire and adhesive heat-shrink before you start, sketch your runs on paper, and check your voltage drop against the table above. A weekend of careful work now beats a season of intermittent faults and a dark helm two miles offshore. Your future self, standing at the dock with everything powering up cleanly, will thank you.
Frequently asked questions
What is the most common marine electronics install mistake?
Undersized wire combined with ignored voltage drop. People pick wire by the device draw and forget how far the current has to travel. On a 12V boat, keep voltage drop under 3 percent on electronics circuits and count the round-trip length of the run, not just the one-way distance.
Should I fuse based on the device or the wire?
Fuse based on the wire. A fuse protects the conductor from overheating and starting a fire, not the gadget. Size the fuse to the wire ampacity and confirm the device draw sits safely below it. Every battery connection needs protection within about 7 inches of the source.
Why do my boat electronics reboot when I start the engine?
That is usually a voltage sag on the start circuit or a shared ground pulling everything down. Keep electronics on a separate feed with a proper battery switch or voltage-sensitive relay, and run grounds to a common bus bar. Both fixes are cheap and stop the flicker for good.
Can I use automotive butt connectors on a boat?
You can, but they fail quickly in salt air. Bare crimps corrode, resistance climbs, and screens start browning out on rough days. Use tinned marine-grade wire and adhesive-lined heat-shrink connectors instead. A ratcheting crimp tool costs about 25 to 40 dollars and pays for itself fast.
Where should I mount a fish finder transducer?
Mount it where clean, undisturbed water flows across its face, away from strakes, through-hull fittings, and prop wash. Turbulent water fills the screen with static and kills bottom lock at speed. The right location matters more than the price of the unit.